I’m a hat girl. John is a hat guy. Hats take up a lot of space! Long gone are the days of our walk-in closet the size of a bedroom to store all of our hats. When downsizing you need to let go of a lot of things. Apparently, we both think our hats are important enough to keep around.

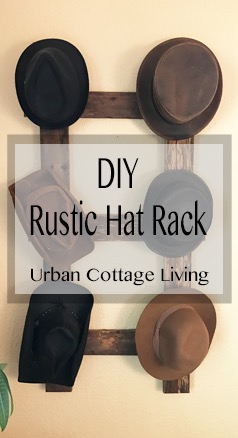
When we first moved into our house, we were renters (you can read more about that here) and didn’t know we were going to end up buying our little house. I threw together this rustic hat rack as a temporary solution. Part storage and part just something to hang on the wall.
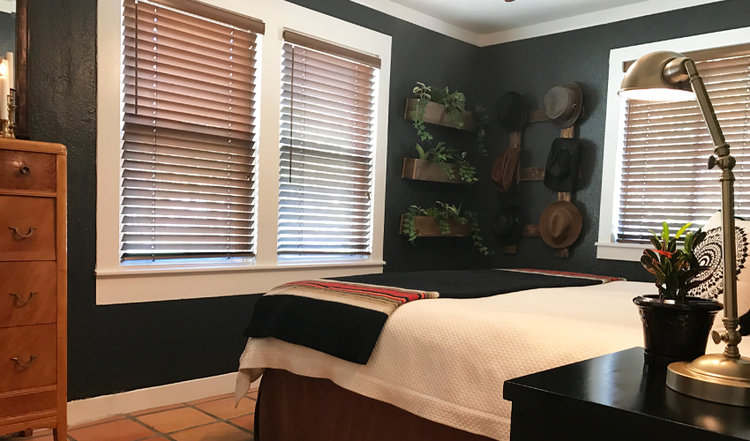
Now that we own the house, it has ended up being the inspiration piece for my upcoming bedroom renovation. I even plan to make a second one soon–because there are still more hats that to be hung!
Supplies:
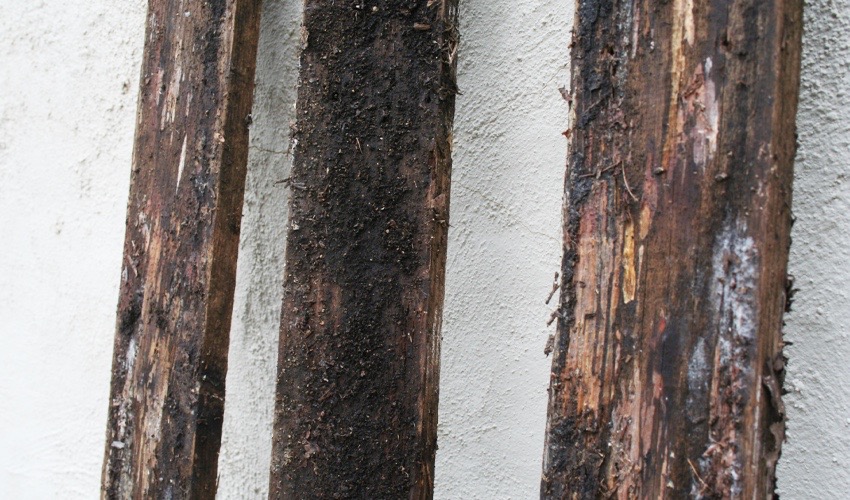
- 3 boards – I used a couple six-foot boards salvaged from an old fence
- 12 2-inch wood screws
- 6 coat hooks
Tools:
- Measuring Tape
- Saw – I used a chop saw
- Drill with a screw bit
- Screwdriver
- Pencil or chalk
Wash
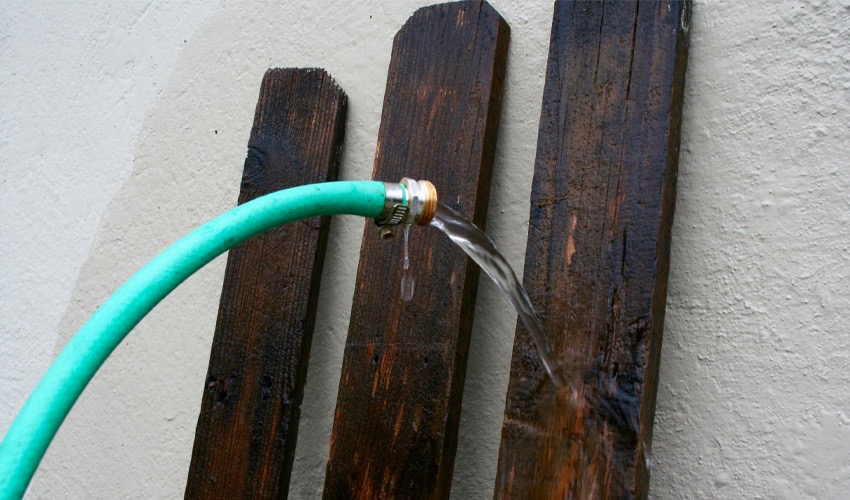
If you are using salvaged boards like I did, make sure you wash them really well. I scrubbed mine with a firm brush using dish soap and water. Allow them to completely dry. Note: my boards are not dry in the following pictures. Do as I say, not as I do.
Cut to Size
You can adjust the size to fit your space or around the size of the boards you use. If you need exact measurements, these are mine to copy.
2 boards at 45 inches long
3 boards at 24 inches long

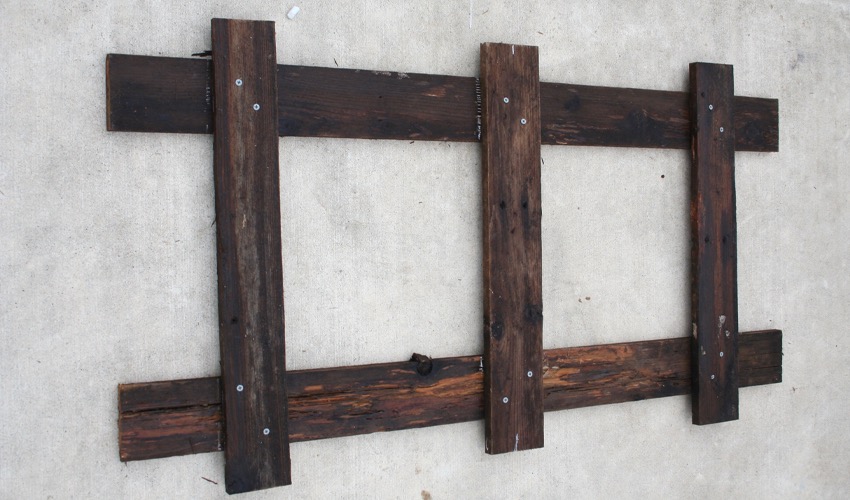
Put Together
Lay the two longer boards parallel on a flat surface. Be sure to lay the side of the board that you want to be the front facing down. I chose the most beat upside to enhance the rustic look.
From the top measure 5.25 inches down. Draw a line where you will attach the first board going across. Then from the top measure 21.25 down and draw your line for the middle board. For the bottom board, measure 5.25 inches from the bottom up.
Line your boards up to the chalk marks. Stand back and make sure everything looks even. Once, you’ve got all your boards where you want them, attach using screws.
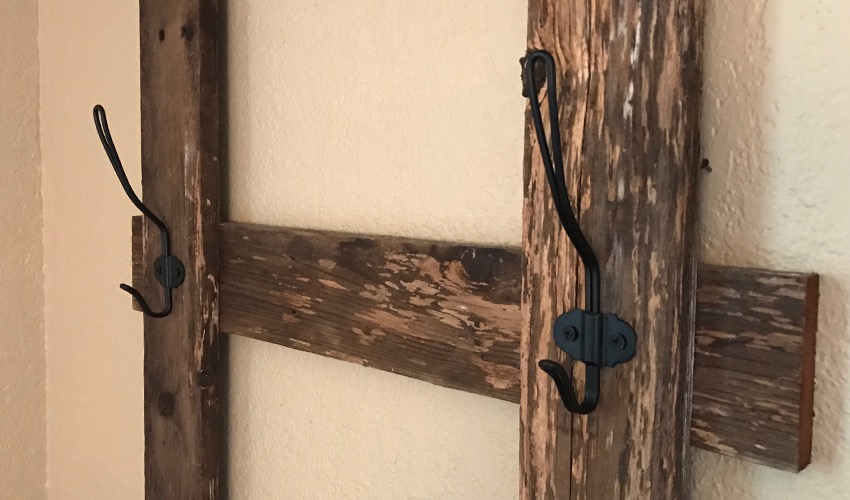
Add the Coat Hooks
Flip the boards over. Using the measuring tape, find the center of your boards and mark where your coat hooks will go. Attach the hooks using a screwdriver. These hooks are a discontinued style from Ikea. So bummed–if you see them there again, let me know!
Hang on the Wall
I screwed my hat rack directly into the wall. Heavy-duty picture hangers on the back of the hat rack and molly screws in the wall will also do the job.


I love your blog Tahni, such a great idea for the hat rack too.